
 Good morning, CardMonkey followers. Happy Spring! The PaperJungle is lush with budding ideas and new projects to try, thanks to generous coupons and sales at local craft stores.
 Last week, one of the stores had all Sizzix and Spellbinders dies at 40% off.
I'd never noticed these "Impressabilities" dies by Spellbinders before the sale; with the sale, each was about $5 and worth a try.
 Am I the only one out there who's never heard of these dies? I thought they were "new" and available in only 5 patterns ... then I did some research for this posting and found 17 patterns available. Now I don't feel so ...crafty? ... for having snatched up 4.
  Anyhow, today I am going to review this product and show you how I eventually wound up using it to my satisfaction. It was a journey ...
I used this pattern (shown above, left), called "Flowers". In my opinion, as a stand-alone embosser or debosser as advertised, the Impressabilities is not thick enough to leave any sort of pattern on cardstock. It's so faint, it's not worth the trouble.
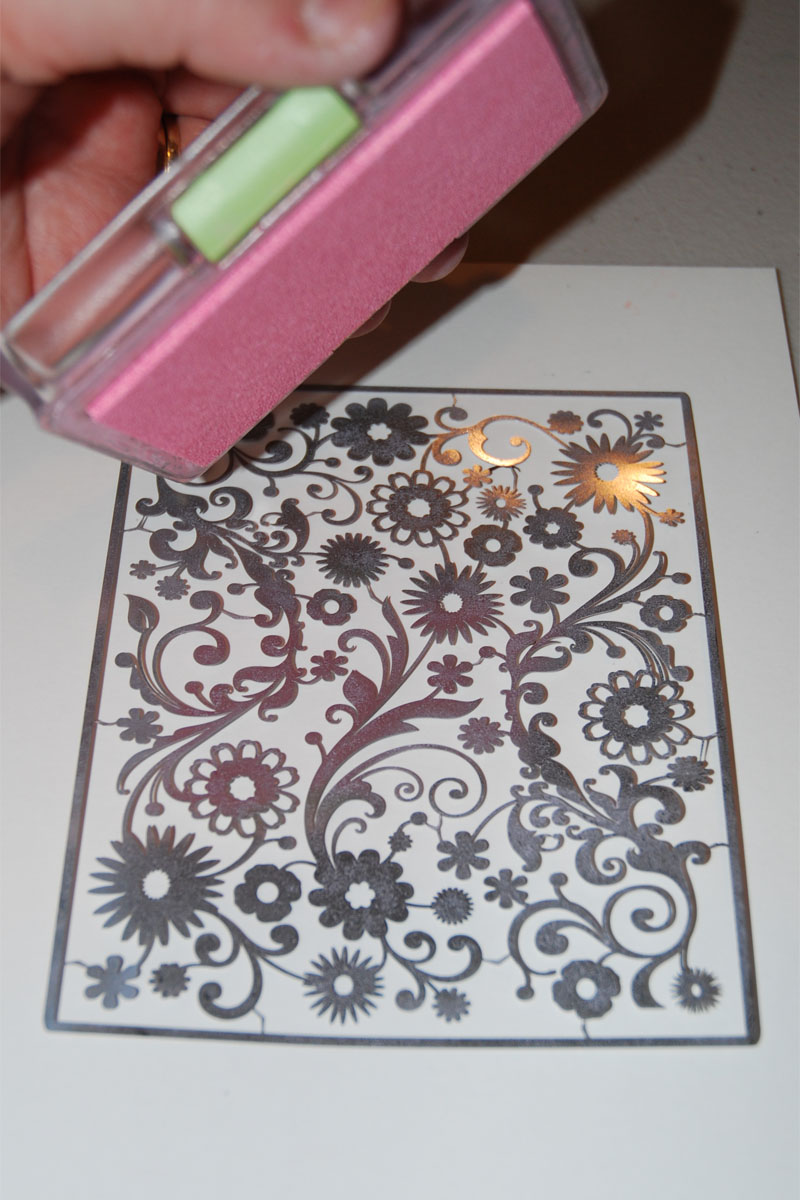 Moving forward, I decided to give it a go as a stencil pattern. Holding the Impressabilities firmly to my cardstock, I stamped it all over with my pink inkpad. Hmm... not bad, but now my Flowers plate is covered in ink. Hmmm....
Carefully, I flipped the image onto a pre-made white card. In the event the Impressability actually worked as an embosser (not likely), I added a folded-up piece of cardstock in the center of the card. This protected the back writing surface of the card from any emboss or deboss, and also served as a shim to give a deeper impression when running this through my Cuttlebug.
 So my Cuttlebug "sandwich" looked like this, from the top down:
- B plate
- Impressability Flower die with ink-side down
- Card with paper shim inserted
- Spellbinders tan smoosh rubber pad
- B plate
- A plate
What you wind up with is a beautiful letterpressed card with your Flowers image gently impressed upon it. In my opinion, this is the best use of the Impressabilities die, making it well worth the $5 investment. This is especially so because it requires no additional expense assuming, like me, you have inkpads galore and already own/use a Cuttlebug.
(Yes, you can also buy the Spellbinders smoosh pad, but I've also used foam instead there, and it works just fine.)
Let me know if you've tried it and had different success with the Impressabilities. The package also says you can easily cut the design up to use it as an embellishment itself, or to cut out the part of the pattern you'd like to use. I can easily see that on a wedding invitation.
What are your thoughts?
5 comments:
Thank you so much for this review, I have one and have never got it to work to my satisfaction! Didn't think about inking it, only started using the spellbinders about a week ago and totally love them!! Thanks again!
Cindy
I found mine the same way as I was looking at all of the Spellbinders goodies when they were on sale. I had not heard of Impressabilities. Or, more likely, not paid attention if I had heard of them. I used this same one and had great embossing success with it. If I can find the sandwich recipe I used, I will send it to you. I love your idea of inking it! I will have to give that a try. Thank you for your great review!
LOL...I did the same thing and had quite a mess to clean up. I did like the finished product though. I have to thank you for letting me know about my copic marker win. Blew me away!!!!
I've never tried this before I might just have to. Thanks for the idea. I have an award for you over on my blog.
~Sarah
http://simplyshaddock.blogpsot.com
I have two and haven't used them. I am happy to read this before I tried. I also have nestabilities and haven't tried them yet either. I am so bad.... tfs
Post a Comment